If an AC or heat pump runs longer, cools less, or your energy bill keeps climbing, an unseen culprit often sits at the center: a refrigerant leak. Catching leaks early protects comfort, preserves the equipment, and keeps costs in check. In this guide, you’ll spot the telltale signs, choose safe DIY tools, and follow clear step-by-step checks you can do today—without breaking rules or voiding warranties.
Why Refrigerant Leaks Matter: Comfort, Costs, Safety, and the Environment
Refrigerant leaks hit twice: comfort drops while costs rise. Even a small undercharge reduces cooling capacity and makes the compressor work harder. According to ENERGY STAR, an incorrect refrigerant charge can cut efficiency by 5–20%—felt as longer run times and rooms that never quite reach set temperature. Notice lukewarm air, weak airflow, or frequent cycling? A leak could be the reason.
Practical, visible signs help too. Ice on the indoor evaporator coil or refrigerant lines—especially when it is not cold outside—suggests low refrigerant. You might see frost building from the indoor coil backward along the copper lines. Hissing or bubbling at service valves or line-set connections can hint at escaping gas. Oily residue on tubing or around joints often points to a pinhole or a failed Schrader core because lubricating oil travels with refrigerant and marks leak sites.
Safety and environmental impact matter as well. Modern systems often use HFCs or HFO blends; while many are non-ozone-depleting, they can still carry significant global warming potential if released. What’s interesting too, some newer blends are “A2L” (mildly flammable). That does not mean your home is unsafe, but it does make good ventilation, avoiding sparks, and treating leaks seriously a smart move. If you are in the U.S., the EPA’s Section 608 rules prohibit intentionally venting refrigerants and require certification to service the sealed system. In the EU and many countries, F-Gas rules are similar. In short: homeowners can look, listen, and test externally—but recovery, charging, and brazing belong to certified technicians.
Ignore a leak and problems snowball. Left alone, the compressor can overheat, coils can be damaged, and moisture or acids may enter the circuit. Investigate early and you are more likely to resolve a simple issue (like a valve core) instead of facing a major component replacement.
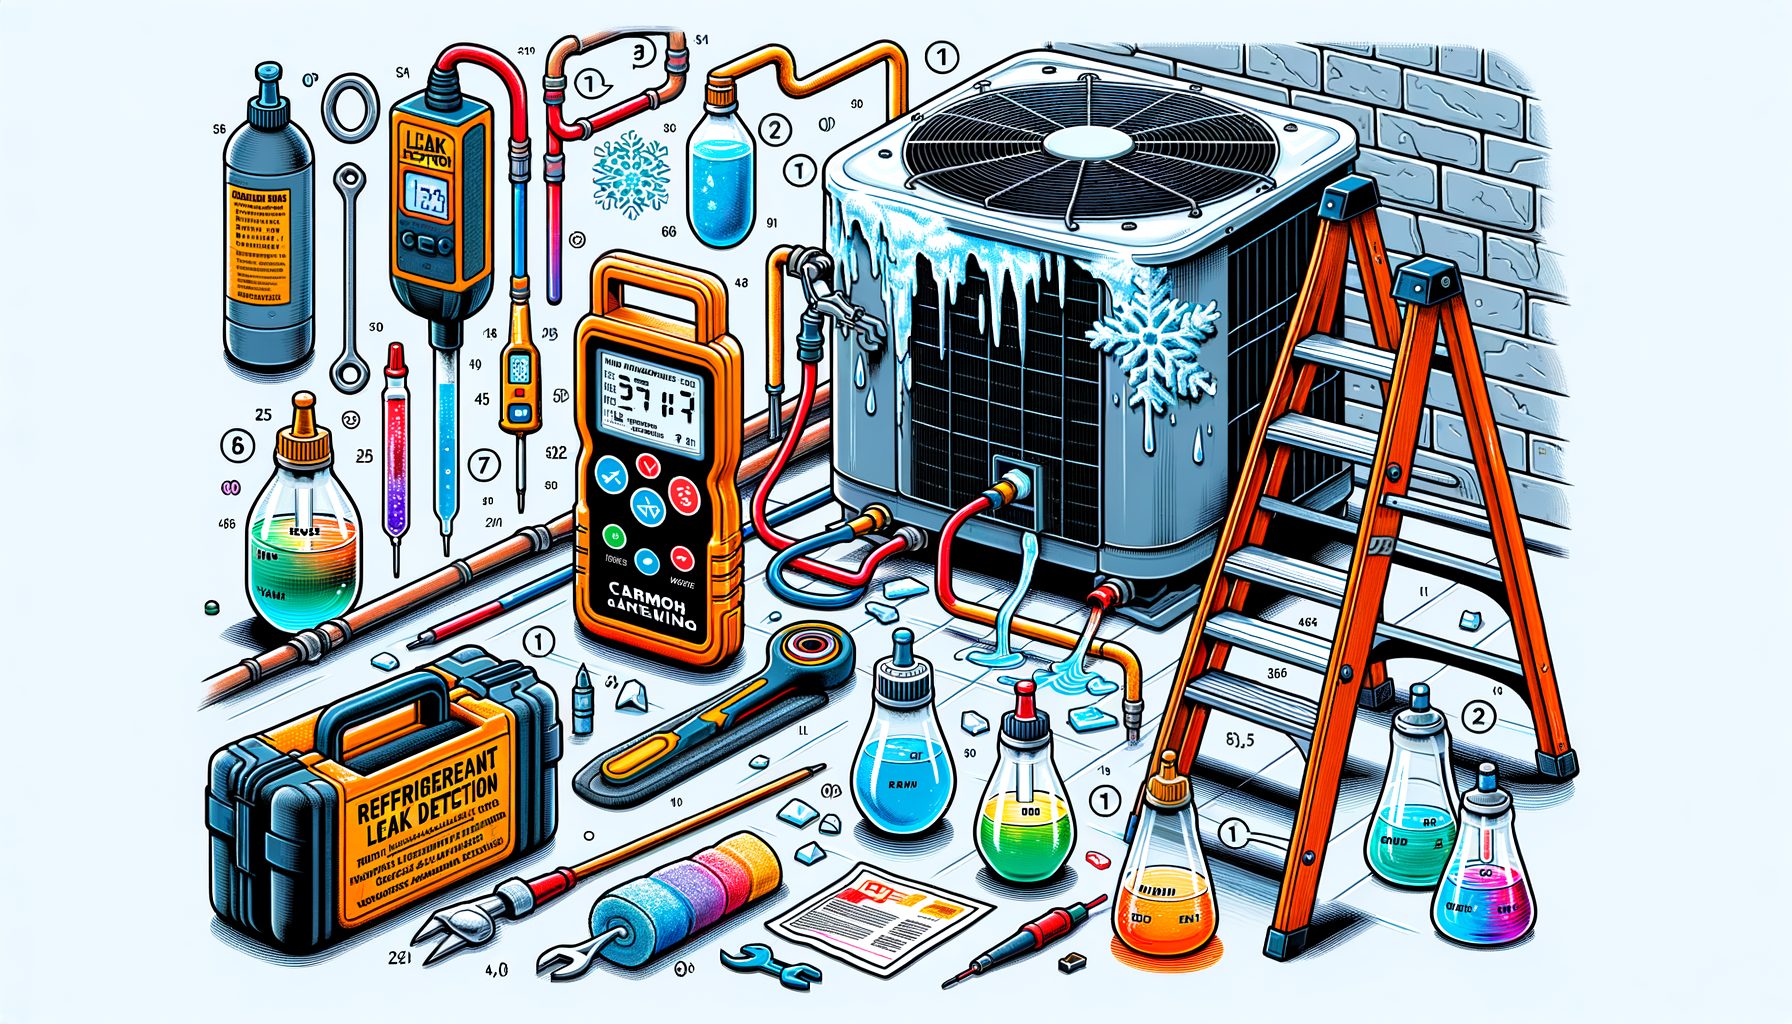
DIY Tools for HVAC Refrigerant Leak Detection and What They Cost
You do not need a truckload of gear to judge whether a leak is likely. A handful of safe, homeowner-friendly tools can point you toward suspicious areas before calling a pro. These tools never open the refrigerant circuit; they help you observe, test surfaces, and gather useful evidence.
Start with a simple inspection kit: a bright flashlight, a telescoping mirror, paper towels, nitrile gloves, and a mild soap solution (dish soap plus water in a spray bottle). Soap bubbles over a joint can reveal leaks on exposed fittings. Add a clamp thermometer for the supply and return ducts to spot abnormal temperature splits. Then this: if you want more precision, consider an electronic refrigerant leak detector designed for common refrigerants like R-410A or R-32.
Below are typical tools and realistic price ranges so you can budget smartly. Prices vary by country and brand, but these ballparks will guide you.
| Tool | Primary Use | Typical Cost (USD) |
|---|---|---|
| Spray bottle + dish soap | Bubble test on accessible joints and valves | $2–$10 |
| Electronic refrigerant leak detector | Sniffs common refrigerants around coils, valves, and line sets | $60–$250 |
| UV dye + UV flashlight (pro use recommended) | Tracer method that glows at leak sites | $30–$120 |
| Clamp thermometer or dual-probe thermometer | Measure supply/return temps and line temperatures | $20–$80 |
| Replacement Schrader cores + core tool | Fix leaking service valve cores (techs usually handle this) | $10–$30 |
Touching the sealed system—connecting manifold gauges, pulling a vacuum, or conducting a nitrogen pressure test—should be left to a certified professional. Homeowners can safely use detectors, soap solution, and visual inspections to build a strong case for repair. If you buy a leak detector, look for sensitivity around 0.10–0.25 oz/yr and compatibility with your refrigerant type.
For safety, wear eye protection and gloves, turn off system power at the disconnect before handling panels, and avoid sparks or open flames—especially if your unit uses an A2L refrigerant. Review official guidance such as EPA Section 608 in the U.S. (EPA Section 608 rules) or EU F-Gas guidance (EU F-Gas rules).
Step-by-Step: How to Check for a Refrigerant Leak Safely at Home
Step 1: Power down and get access. Turn off the HVAC system at the thermostat and at the outdoor disconnect. Remove indoor and outdoor access panels as permitted by the manufacturer. Do not disturb sealed caps or open the refrigerant circuit.
Step 2: Start with a clean inspection. Dust hides clues. Use a dry cloth or a gentle vacuum to clear debris. Inspect the indoor evaporator coil area, the outdoor condenser coil, service valves, and visible sections of the copper line set—especially where it passes through walls or rubs against brackets.
Step 3: Look for visual flags. Oily spots, greenish or dark stains on copper, or rubbed areas where insulation is worn can indicate a pinhole. Frost or ice on the suction line inside the air handler during cooling mode is a classic low-charge sign. Water under the air handler after defrosting ice is another hint.
Step 4: Listen and sniff. With power off, listen closely near service valves, braze joints, and U-bends on coils for faint hissing. Many refrigerants are odorless, so lack of smell does not rule out a leak. If you suspect an A2L refrigerant, ensure good ventilation and avoid ignition sources while testing around the unit.
Step 5: Soap-bubble test on accessible joints. Spray a light soap solution on exposed flare fittings, Schrader valve caps, and brazed joints you can see. Watch for growing bubbles over 30–60 seconds. Wipe clean and test from multiple angles. Never remove a cap on a pressurized system unless you are qualified.
Step 6: Use an electronic leak detector. Move the probe slowly, 1–2 centimeters from suspected areas, at a steady pace. Start low and then move upward, as heavier-than-air refrigerants can settle. Repeat to confirm. Cross-check any alert with the bubble test if possible.
Step 7: Check performance clues. Measure the temperature split between the return grille and the supply vent closest to the air handler. A healthy split is typically around 16–22°F (9–12°C) in cooling under normal load. A very low split—combined with icing or long cycles—supports a leak suspicion. ENERGY STAR’s seasonal maintenance tips explain expected performance ranges (ENERGY STAR: Heating & Cooling).
Step 8: Document with photos and notes. Take clear photos of any oily residue, bubble reactions, or worn insulation. Note dates, outdoor temperature, and symptoms (e.g., “runs 40 minutes per cycle,” “supply 57°F, return 74°F”). Such evidence speeds up professional diagnostics and reduces revisit costs.
Step 9: Call a pro for sealed-system work. When strong indicators of a leak show up, the next steps—recovery, nitrogen pressure testing, brazing, evacuation, and accurate charging—belong to certified technicians. In the U.S., refrigerant handling requires Section 608 certification; similar requirements exist worldwide.
Professional Help, Realistic Costs, and Leak Prevention That Works
When to call a certified technician. Bring in a pro if you see frost on the evaporator coil or suction line, detect leaks with soap or an electronic detector, need refrigerant added more than once, or suspect coil corrosion. Also call if the outdoor unit trips breakers, the indoor coil repeatedly ices over, or the system short-cycles. These patterns suggest low charge or restrictions that can damage the compressor.
What it might cost. Prices vary by region and refrigerant type, but these ranges are common in many markets: a diagnostic with leak search can run $120–$350. A dye or nitrogen pressure test may add $100–$300. Minor repairs like replacing a Schrader core or tightening a flare fitting can be relatively quick, while brazing a line-set pinhole or repairing a coil crack takes longer. Refrigerant is priced per pound and fluctuates; plan for several hundred dollars if the system is significantly undercharged. If a coil is leaking, replacement can cost much more, but a sound repair can restore years of service if the system is otherwise healthy. Always request an itemized estimate.
How to talk to your technician. Ask for the suspected leak source and the method used to confirm it (dye, electronic detector, nitrogen decay). Request before-and-after measurements: superheat, subcooling, and temperature split. Confirm that the system was evacuated and weighed in per manufacturer specs. If your unit is still under warranty, ask whether a coil replacement is covered. You can verify equipment certifications in the AHRI Directory (AHRI Directory) and review safety classifications through ASHRAE (ASHRAE Standards).
Prevention you can start today. Keep filters clean and properly sized to reduce system strain. Maintain airflow by clearing return grilles and cleaning coils annually. Replace brittle line-set insulation and add UV-resistant wrap outdoors to prevent cracking. Secure and cushion copper lines so they do not rub on brackets or walls. Control corrosion by keeping outdoor coils free of salty mist or fertilizers and gently rinsing with water. Schedule a yearly professional checkup to verify charge, look for early corrosion, and adjust charge only after leaks are fixed. Well, here it is: avoid quick-fix sealants; they can clog metering devices and are not a substitute for proper repairs. Good maintenance prevents most leaks and keeps efficiency high.
FAQs: HVAC Refrigerant Leak Detection
Q: Can I run my AC if it has a refrigerant leak? A: Risky. Running with low charge can overheat the compressor and ice the coil, turning a small repair into a major replacement. If you suspect a leak—frosting, weak cooling, detector alerts—shut it down and schedule service.
Q: Do refrigerants have a smell? A: Many common refrigerants are odorless, so lack of smell does not rule out a leak. Some leaks make faint hissing, and oil stains can appear at joints. Use a soap solution or an electronic detector for better confirmation.
Q: Will a can of refrigerant fix my problem? A: Adding refrigerant without fixing the leak is illegal in many places and usually temporary. The right fix is find-and-repair, then evacuate and recharge to manufacturer specs—work for a certified technician under EPA or F-Gas rules.
Q: Do stop-leak additives work? A: Sealants may slow tiny leaks but can foul components like expansion valves. Most manufacturers and many pros avoid them. A proper braze or coil replacement is more reliable and protects long-term performance.
Q: How often should I check for leaks? A: Do a quick seasonal inspection: look for ice, listen for hissing, and check your temperature split. Have a professional maintenance visit yearly to catch early issues and verify correct charge after any repair.
Conclusion and Next Steps
Refrigerant leaks steal comfort, spike bills, and stress expensive components—but you are not powerless. You now know the most common signs (ice, long cycles, warm air), the safest DIY tools (soap solution, thermometer, electronic detector), and practical steps to inspect coils, valves, and lines without opening the sealed system. You also know when to call a certified technician, what costs to expect, and how smart maintenance prevents leaks in the first place.
Your best next move: do a 20-minute inspection today. Power down, check for frost and oily spots, run a soap test on accessible joints, and measure your temperature split. Document what you find with photos. If results point to a leak, book a licensed pro who will confirm the source, repair it correctly, evacuate, and charge by the book. Use trusted references like EPA Section 608 guidance and ENERGY STAR tips to stay informed and confident.
Do not let an invisible leak control your comfort or your budget. Take a small, clear step now—inspect, document, and act—and you will protect your system, your wallet, and the environment. Ready to start? Grab a flashlight, mix a simple soap solution, and give your system a thoughtful check. Sometimes the smallest bubbles tell the biggest story. What will your quick inspection reveal today?
Sources:
U.S. EPA Section 608: Refrigerant Management Requirements
EU F-Gas Regulation Overview
ENERGY STAR: Heating & Cooling Guide
AHRI Directory of Certified Product Performance
ASHRAE Standards and Guidelines