If your air feels warm, your electric bill is creeping up, or the AC runs longer than it used to, DIY maintenance is likely due. Learning to clean evaporator and condenser units safely can restore cooling, cut energy use, and extend equipment life. The guide keeps everything simple, practical, and safe—great for first-time DIYers and seasoned homeowners alike. Follow the steps to avoid common mistakes, protect your warranty, and bring the system back to peak efficiency without guesswork.
Why AC Coils Matter: Performance, Energy Savings, and Health
Your air conditioner moves heat in a loop: the indoor evaporator coil absorbs heat from the air inside, and the outdoor condenser coil releases that heat outdoors. When coils get dirty, heat can’t move efficiently. The fan has to push harder, the compressor runs longer, and components wear out faster. You’ll notice weaker cooling, longer times to hit the thermostat setpoint, and sometimes rising humidity. In short, clean coils mean faster cooling, lower costs, and quieter operation.
Dirt on evaporator fins acts like a blanket, blocking heat transfer and airflow. Pet hair, dust, and cooking oils often collect on indoor coils. Outdoors, pollen, cottonwood fluff, grass clippings, and road dust clog the condenser fins. Even a thin film of grime cuts surface contact and forces longer cycles. If you’ve seen short-cycling (frequent starts and stops), hot spots at home, or a musty odor at startup, coil fouling might be part of the problem.
Energy savings are real. The U.S. Department of Energy reports that replacing a dirty filter can cut air conditioner energy use by 5–15%—and clean coils help lock in that gain by restoring airflow and heat exchange. The combined effect is steadier cooling with less strain on motors and the compressor. While every system differs, many homeowners report noticeably colder supply air and quicker cooldowns after thorough coil and drain cleaning. What’s interesting too, those improvements often show up the very first day.
There’s a health and comfort angle as well. A wet, dusty evaporator coil and an overflowing drain pan can invite microbial growth, which leads to odors and can aggravate allergies. Keeping the coil clean and the condensate line clear helps prevent water leaks and reduces musty smells—especially in humid climates or during long cooling seasons.
If you rent or live in a multi-family building, coil maintenance still matters. Outdoor units may sit near landscaping or dryer vents that shed lint, while indoor air handlers in closets gather dust quickly. Basic cleaning can deliver quick wins even in small spaces or older buildings.
Well, here it is: quick data to plan your maintenance cadence and understand typical benefits. Actual results vary by climate, usage, and system condition.
| Item | Typical Interval | Notes / Expected Impact |
|---|---|---|
| Filter replacement/cleaning | Every 1–3 months | DOE notes 5–15% energy savings vs. clogged filter; crucial for airflow. |
| Outdoor condenser coil rinse | 1–2 times per cooling season | Removes pollen/dust; can reduce run time and compressor strain. |
| Indoor evaporator cleaning | Annually (more in dusty/humid homes) | Improves cooling, reduces odors, protects against drain pan overflow. |
| Condensate drain flush | Monthly in active cooling | Prevents clogs, water leaks, and moldy smells. |
For more on air conditioner efficiency and maintenance, see the U.S. Department of Energy’s Energy Saver guidance at energy.gov and ENERGY STAR’s homeowner tips at energystar.gov.
Safety First: Tools, PPE, and When to Call a Pro
Before touching your AC, make safety the priority. Residential systems combine electricity, sharp metal edges, and water. Good prep minimizes risk. Always disconnect power at the breaker and at the outdoor disconnect before cleaning. It takes seconds and can prevent shocks or motor damage. If you’re unsure which breaker controls the system, stop and label it with a pro’s help.
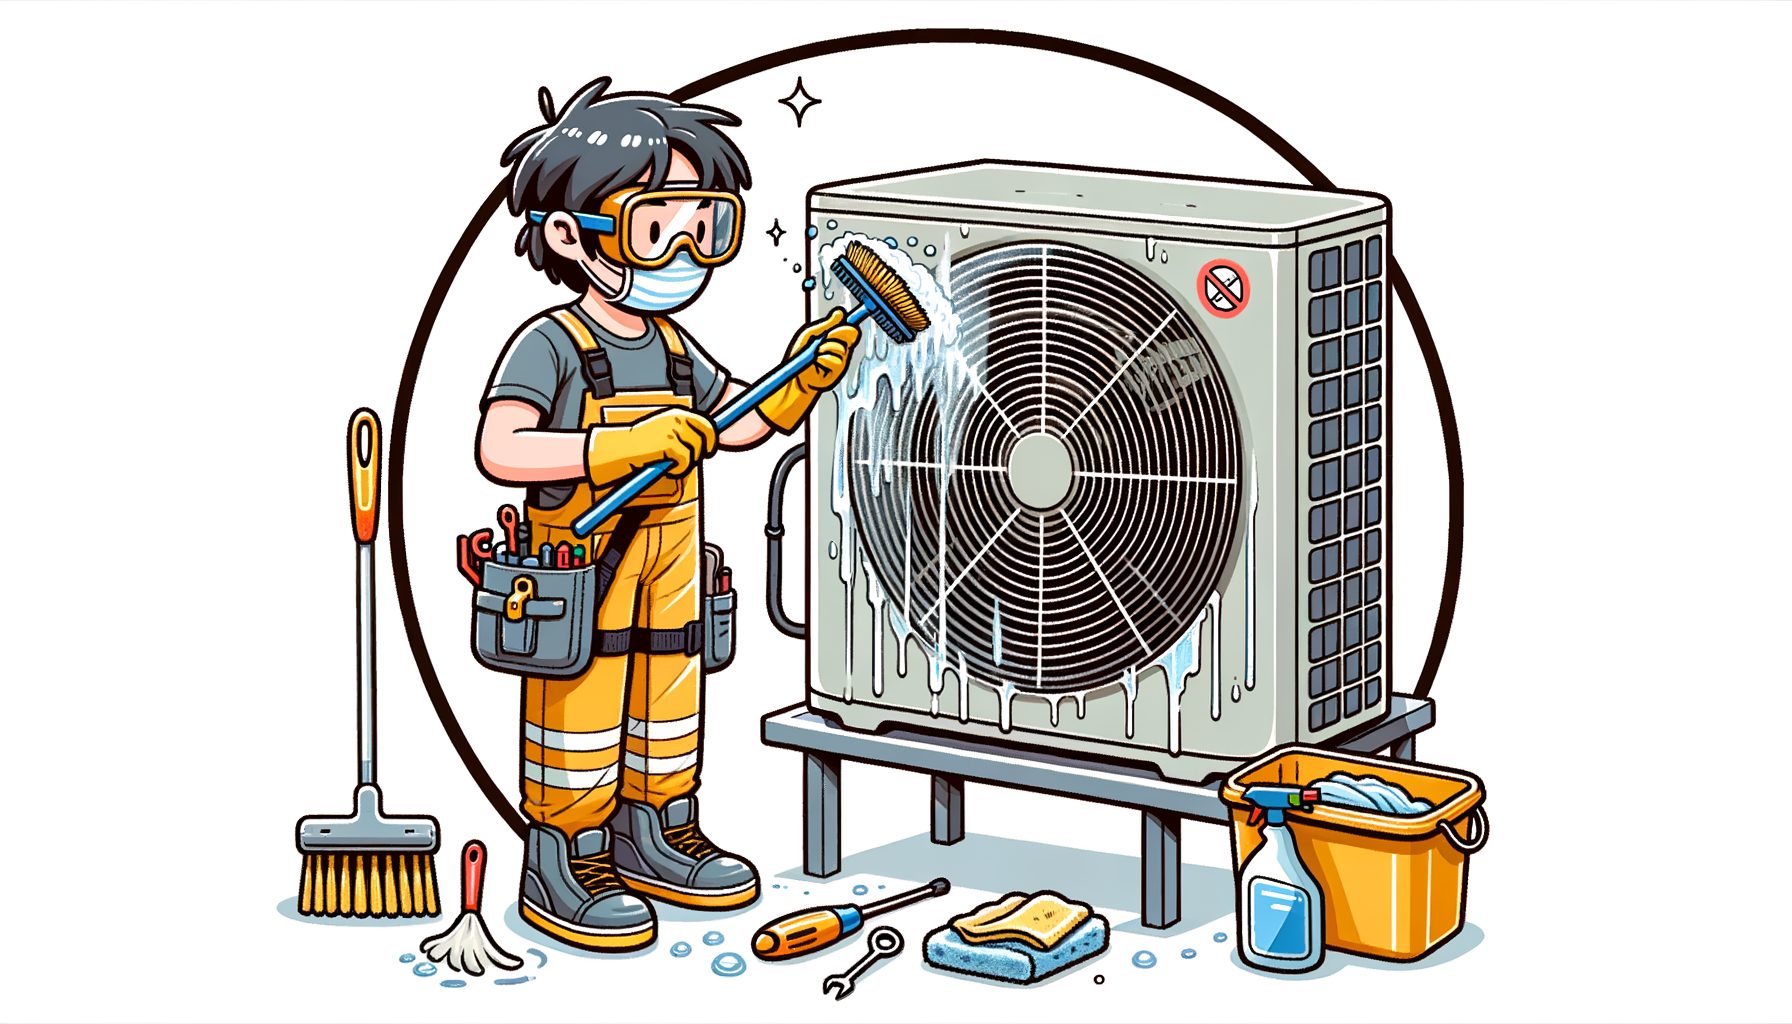
Helpful tools and PPE include a garden hose with a gentle spray nozzle, a soft coil brush, a vacuum with a soft brush attachment, a no-rinse coil cleaner rated for aluminum coils, nitrile or work gloves, eye protection, a fin comb (optional), a small screwdriver, rags or microfiber towels, and a wet/dry vacuum for the condensate drain. Avoid harsh chemicals, bleach on coils, and high-pressure washers that can fold fins.
Turn off power properly. For outdoor units, flip the service disconnect to OFF and shut off the breaker in your panel. For indoor air handlers or furnaces, switch off the furnace/air handler breaker and the service switch (if present). Wait at least five minutes for capacitors to discharge, and do not touch capacitor terminals or control boards. Keep water away from electrical components and connections.
Know your boundaries. Do not open or handle the sealed refrigerant circuit (copper lines, expansion device, service valves) or attempt to recharge refrigerant. If you smell refrigerant, see oily residue on lines, hear hissing, or notice ice on pipes or the coil, stop and call a licensed HVAC technician. Those signs suggest a deeper issue that cleaning won’t solve.
Warranty matters. Many manufacturers allow routine coil cleaning and filter service by homeowners, but drilling holes, bending fan blades, removing the wrong panels, or using unapproved chemicals can void coverage. Check your user manual online (search your brand + model) for approved cleaners and access steps. Major brands like Trane, Carrier, Lennox, and Daikin publish maintenance guidance on their websites; start there if you’re unsure.
Finally, prepare your space. Clear vegetation within at least 24 inches of the outdoor unit. Indoors, protect flooring and electronics near the air handler. Keep children and pets away while the unit is open. Have a clear plan and move slowly—most damage happens when people rush or use excessive force on delicate fins.
If at any point you feel uncertain, pause. A quick call to a local pro for a seasonal tune-up can pair deep cleaning with system checks like refrigerant charge, capacitor health, and airflow testing.
Step-by-Step: Clean the Outdoor Condenser Unit
Step 1: Shut off power. Turn off the outdoor disconnect next to the unit and the AC breaker in your main panel. Confirm the fan will not start.
Step 2: Remove surface debris. Pick out leaves and twigs by hand. Use a soft brush or vacuum to lift dirt on the grille and coil surface. Avoid pushing debris deeper into the fins.
Step 3: Inspect the coil fins. Look for flattened or damaged sections. If needed, gently straighten with a fin comb. Do not over-bend fins; they’re thin aluminum and can tear.
Step 4: Decide on access. Many units let you remove side panels or lift the top fan assembly carefully to reach the coil interior. If you remove the top, support the fan without straining wires and keep water off the motor. If you’re not comfortable removing panels, you can still clean from the outside with gentle, angled rinsing and a coil cleaner—just be extra careful not to drive dirt inward.
Step 5: Apply coil cleaner. Use a non-acid, non-caustic cleaner labeled for condenser coils. Follow the label. Typically, you spray onto dry fins from the outside and let it foam for 5–10 minutes to lift grime. Work in sections so cleaner doesn’t dry out in hot weather.
Step 6: Rinse gently. With a garden hose on a low-pressure setting, rinse from the inside out if you have access; that pushes debris outward. If you cannot reach the inside, aim the spray at a shallow angle so water flows through the fins rather than straight in. Avoid jet nozzles or pressure washers—they can fold fins and flood electrical components.
Step 7: Clean the base and check drainage. Flush debris from the bottom of the unit. Ensure the unit sits level and that water can drain out freely. A level base protects the compressor and improves oil return inside the system.
Step 8: Reassemble and dry. Reinstall panels and the fan top if removed. Let surfaces drip-dry for a few minutes. Ensure all screws are snug but do not overtighten into thin sheet metal.
Step 9: Restore power and test. Turn on the breaker and the disconnect. Set the thermostat to cool and listen for smooth operation. You should feel cooler air at supply vents within a few minutes. Check that the outdoor fan runs quietly and that no panels vibrate.
Step 10: Final check. After 15–20 minutes of operation, verify the large copper line (suction line) feels cool and lightly sweats near the outdoor unit in humid weather. That quick touch test serves as a sanity check that heat exchange is happening. If you hear unusual noises or see repeated short cycling, power off and call a pro.
Routine condenser cleaning usually takes 30–60 minutes and pays off quickly in better performance and lower stress on the compressor. For manufacturer-specific how-tos, see your brand’s maintenance page (for example, the DOE’s Energy Saver overview links to additional resources).
Step-by-Step: Clean the Indoor Evaporator Coil and Drain Safely
Step 1: Power down. Switch off the furnace/air handler breaker and service switch. Wait a few minutes for electronics to discharge. Doing so protects the control board and you.
Step 2: Replace or clean the filter. The filter is your first defense against coil fouling. Use the size and MERV rating recommended by your system or installer. High-MERV filters can reduce airflow in some systems; when in doubt, a quality MERV 8–11 is a safe middle ground for many homes. Replace or wash filters before cleaning the coil.
Step 3: Access the coil. The evaporator coil is usually in a cabinet above a furnace or inside an air handler. Remove the access panel screws. Some coils are cased and have a removable panel; others require removing a small service plate. Do not cut sealed panels or insulation. If access is very limited, stop and schedule professional cleaning to avoid damage.
Step 4: Protect nearby components. Place a towel in the drain pan to catch drips, and cover any exposed electronics with a plastic sheet you can remove later. Keep cleaner and water away from the blower motor and control board.
Step 5: Dry clean first. Use a soft brush or vacuum with a brush attachment to remove loose dust from the coil face and the upstream side. Brush in the direction of the fins to avoid folding them. Go slowly; aluminum fins bend easily.
Step 6: Apply no-rinse evaporator coil cleaner. Choose a foaming, no-rinse product labeled for indoor evaporators. Spray evenly, coating the fins. The condensate will carry cleaner into the drain during the next cooling cycle. Let it dwell per the label. Avoid bleach or harsh chemicals on the coil; they can pit aluminum and damage insulation.
Step 7: Clear the condensate drain. Locate the drain line (usually a PVC pipe leaving the pan). At the outside end, use a wet/dry vacuum to pull out sludge for 1–2 minutes. At the service tee near the air handler (if present), pour about 1 cup of distilled vinegar to discourage algae. Do not use strong acids. Ensure the float switch (if equipped) moves freely; this switch can shut down your system if water backs up.
Step 8: Inspect the pan and insulation. Wipe any slime, check for rust, and ensure the pan drains fully. If you see standing water after the drain flush, repeat vacuuming or call a pro to check for deeper clogs or improper slope.
Step 9: Reassemble and test. Replace the access panel, remove protective plastic, restore power, and run the system. Listen for smooth airflow and check a supply vent; air should feel cooler and fresher after a few minutes.
Note for ductless mini-splits: You can safely open the front cover, remove and wash the filter screens, and gently vacuum the coil face with a soft brush. For deep cleaning of the blower wheel and drain pan using wash bags and rinse, be cautious—water can reach circuit boards. Many homeowners choose a professional deep clean annually for mini-splits to avoid electrical damage.
If you notice ice on the coil, a strong refrigerant smell, persistent musty odor, or water dripping from the cabinet, stop. Those symptoms point to airflow/refrigerant problems or drain issues that require professional diagnostics.
Preventive Habits and a Simple Seasonal Checklist
Great maintenance is less about one big job and more about small, consistent habits. The checklist below helps you keep airflow high, coils clean, and your system efficient throughout the year. The key is to schedule reminders and make each task quick and repeatable. Then this becomes a routine you barely have to think about.
• Every 30 days in cooling season: Check the air filter. Replace disposable filters or wash reusable ones if visibly dirty. Mark your calendar or set a phone reminder. Pet owners, smokers, and urban dwellers usually need more frequent changes.
• Every 1–2 months: Inspect the outdoor unit. Remove leaves, cut back plants to at least 24 inches of clearance on all sides, and keep the top free from obstructions. Gently rinse visible dust from the coil in pollen season.
• Every spring: Do a full outdoor coil clean and a basic indoor coil inspection and drain flush. That prep sets your AC up for summer. If the system is older or has had issues, schedule a professional tune-up to check charge, electrical components, and static pressure.
• Mid-summer: Re-check the drain line. If you live in a humid climate, add a cup of vinegar monthly to the service port and vacuum the outside end of the line. Replace any brittle vinyl tubing on condensate pumps if you see cracks.
• Every fall: Clean and cover the top of the outdoor unit with a breathable cover (do not wrap tightly around the sides, as it can trap moisture). Verify no nests or debris accumulate over winter. For heat pumps, do not cover the sides if you use it for heating.
• Year-round: Keep supply and return vents open and unblocked. Closing too many vents can reduce airflow, chill the coil, and increase the chance of icing. If rooms are uneven, talk to a pro about balancing or duct improvements rather than closing vents.
Here’s a quick planner to align tasks with seasons:
| Season | Tasks |
|---|---|
| Spring | Full condenser clean; filter change; indoor coil visual check; drain flush; pro tune-up if needed. |
| Summer | Monthly filter check; quick condenser rinse; drain maintenance; monitor for ice/odors. |
| Fall | Final filter change; light outdoor clean; breathable top cover; clear leaves. |
| Winter | Keep area clear; no heavy items on top; check for pest nests; plan next spring service. |
For broader indoor air and moisture guidance that supports AC health, visit the EPA’s resources on homes and IAQ at epa.gov. Balanced humidity and good filtration make coil cleaning easier and more effective.
Q&A: Common DIY AC Maintenance Questions
Q: How often should I clean my AC coils? A: Rinse the outdoor condenser coil 1–2 times per cooling season and do a deeper clean each spring. Clean the indoor evaporator coil annually, or more often if you have heavy dust, pets, or high humidity.
Q: Can I use a pressure washer on the outdoor unit? A: No. High pressure folds fins and can force water into motors and wiring. Use a garden hose with gentle spray and a coil-safe cleaner.
Q: What cleaner is safe for coils? A: Use non-acid, non-caustic cleaners specifically labeled for evaporator or condenser coils. For indoor coils, choose a no-rinse product. Avoid bleach or household degreasers.
Q: My coil keeps freezing. Will cleaning fix it? A: Cleaning helps if the cause is poor airflow (dirty filter, clogged coil). But freezing can also mean low refrigerant, a failing blower, or duct issues. If icing returns after cleaning and a fresh filter, call a pro.
Q: Will DIY cleaning void my warranty? A: Routine cleaning and filter changes are generally allowed. However, damage from using the wrong chemicals, bending fins, or disassembling sealed components can void coverage. Check your manufacturer’s maintenance instructions to be safe.
Conclusion
Your AC is a heat-moving machine, and clean coils are its superpower. You learned why evaporator and condenser coils matter, how to prepare and stay safe, and the exact steps to clean each component and the condensate drain. You now have a seasonal checklist that keeps airflow high and energy bills lower, plus answers to the most common DIY questions. The result: faster cooldowns, fewer breakdowns, and better indoor comfort—without complicated tools or risky shortcuts.
Take action this week. Pick a cool morning, shut off power, and do a condenser clean—it often takes under an hour and delivers instant performance gains. Then set monthly reminders to check the filter and the drain line. If your evaporator coil is accessible, follow the no-rinse cleaning steps; if not, schedule a pro for an annual deep clean and system check. Either way, you’re in control of reliability and comfort.
If you found this helpful, share it with a friend or neighbor who complains about weak AC or high bills. Bookmark the checklist for spring and summer, and consider a professional tune-up if you notice icing, leaks, or unusual noises after cleaning. For manufacturer guidance and energy tips, keep Energy Saver and ENERGY STAR handy for quick references.
Your home should feel like a calm, cool refuge—not a guessing game. Start small, stay consistent, and your AC will reward you with smooth, efficient operation when you need it most. What day this week will you set aside 45 minutes to give your system the clean it deserves?
Sources
• U.S. Department of Energy – Energy Saver: Central Air Conditioning: https://www.energy.gov/energysaver/central-air-conditioning
• ENERGY STAR – HVAC Guide for Homeowners: https://www.energystar.gov/saveathome/heating_cooling
• U.S. Environmental Protection Agency – Indoor Air Quality: https://www.epa.gov/indoor-air-quality-iaq
• Manufacturer maintenance tips (examples, check your model): Trane, Carrier, Lennox, Daikin service pages